


Pysanky: Decorating Easter Eggs with Beeswax and Coloured Dyes - I Gave the Traditional Ukrainian Craft a Go!
- Jem the beekeeper

- Mar 4
- 7 min read

I only discovered Pysanky at the beginning of 2024. As a beekeeper who keeps poultry in the apiary, I have a healthy supply of both beeswax and eggs, so it would have been rude not to give this a go!
I obviously loved it, otherwise this post wouldn't exist! It's an incredibly therapeutic craft. Every now and again, I take a few freshly laid eggs and blow them empty, saving the contents for scrambled egg of course! I then leave the shells to dry so they are ready to be decorated whenever I fancy it.
So, what is Pysanky?
Pysanky are traditional Ukrainian Easter eggs decorated using a wax-resist (batik) method. Intricate designs are carefully drawn onto the shell using molten beeswax, applied with a specialised stylus called a kistka. The egg is then submerged in vibrant dyes, working from lighter colours to darker ones, with more beeswax added in between dips to preserve the coloured areas of the design.
The name Pysanky comes from the Ukrainian verb pysaty, meaning "to write." Before becoming most closely associated with Easter, these decorated eggs were historically used in Pagan Spring rituals to celebrate the return of the sun after a long winter. Eggs are, of course, symbolic of new life. Nowadays, many artists enjoy making them all year round. It is a wonderfully meditative art form and a lovely way to tell a story.
I thought it would be fun to share some of my earlier experiments so you can see how my first attempts turned out, along with the kit I used.
To make Pysanky you will need:
An egg blowing kit (if you don't want to put your mouth to the egg!) - (my kit came with a hole-making device and a handheld blower)
A pysanky kit - (most typically contain instructions, at least one kistka, and some dyes)
Beeswax - a small bar/block. (I use my own, of course - they are perfect for this!) Need some?
Pale eggs - (chicken eggs are commonly used but you can use others too!)
A candle - (as a heat source for softening and wiping away the wax, and/or as a source of extra beeswax - I collected the wax drips from a twisty drip candle in my kistka, which worked really well)
Kitchen roll or an old rag - (for wiping the egg and cleaning up)
TIME! - Allow a few days and always let the eggs dry out completely between each step
The purchases I made beforehand
To get started, I bought an egg blowing kit and a traditional Ukrainian Pysanky egg decoration craft kit. The Pysanky kit was quite expensive, but it contained a variety of dyes, three different sized kistka, and the instructions were easy for a beginner to follow, so for me it was worth it.


Step 1: Make a hole in the end of the egg
Use a cloth to gently remove any debris from your egg. Hold it with one hand and use the other to rotate the hole cutter against the surface of the shell. With a little pressure, it will grind its way through to make a neat hole. Some people make a hole at either end of the egg so they can later thread it onto a ribbon. It is entirely up to you how you approach this.
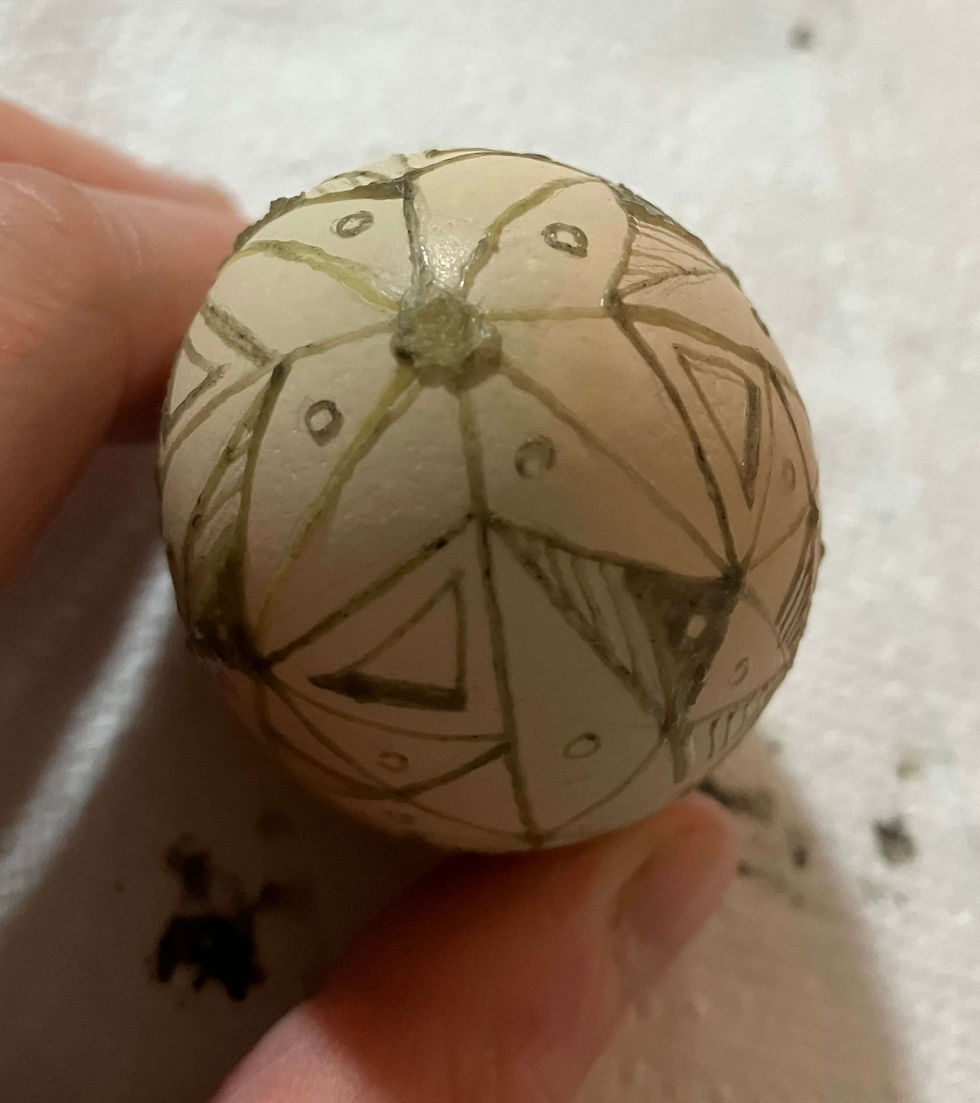
Tip: If you want to use bright colours in your design (such as the natural eggshell colour or yellow), use a white or pale-coloured egg rather than the typical creamy brown egg shown in the photo here.

2) Drain the egg
I always do this just before lunch so I can have scrambled egg! To blow the egg, I use the blower from the kit. Insert the metal tip into the hole in the egg and position it over a small bowl or pot. Gently pump air into the egg and, as the air goes in, the yolk and egg white are forced out through the hole. Do this gently and you will notice the egg becoming progressively lighter as you go.
I always have a good supply of dried empty eggs to hand for this activity.

Step 3: Wash the egg and let it dry (this can take a few days but it is absolutely worth it)
Once the egg is empty, submerge the egg blower in a bowl of warm soapy water. Press the blower and then allow it to expand so it fills with soapy water. Squeeze this into the egg and repeat several times, then shake the egg to rinse the inside. Use the blower as in Step 2 to expel the soapy water. Leave the egg to dry in a warm spot, such as on a radiator.
Important: If you do not let the egg dry properly, you risk a small amount of water escaping (even once you have plugged the hole!), which can cause dyes to run and your artwork to smudge. Trust me on this one. Patience is your friend.

Step 4: Set yourself up
Once I had a few designs in mind, I laid all the kit out in front of me. I mixed up four dyes (yellow, red, black, and green) and poured them into pot noodle pots, which were ideal for dipping. I also pushed three cocktail sticks into a beeswax bar so I could rest the eggs in an elevated position between dips and allow them to dry properly. I also used a pencil to lightly sketch the design onto the egg. To create even segments, some people stretch a thin elastic band over the egg and draw along its edge as a guide.
Step 5: Preserve the areas you want to stay pale and plug the hole
I loaded my kistka with some beeswax, held it to the candle to melt it, and then started drawing onto the egg. I also used blobs of wax from the candle to plug the hole, so that no dye would seep inside the egg during dipping. The beeswax on the egg at this stage preserves the natural eggshell colour underneath, so everything I wanted to stay white or pale was covered first.
Step 6: Drop it into the first dye!
After drawing wax over the areas you want to stay pale, submerge the egg in the first pot of dye. Mine was yellow. The egg kept bobbing up to the surface, so I used a stainless steel spoon and a clothes peg to hold it beneath the surface. I think I left it in for around 30 seconds to 1 minute, but the instructions in your kit will guide you on timing.
After removing the egg, I dabbed it with a piece of kitchen roll and left it to dry.


Step 7: Once dry, preserve the next colour
I left mine overnight to ensure it was completely dry. I then played a game of "colouring in", applying beeswax over everything in the design I wanted to remain yellow.

Step 8: Submerge the egg in the next dye (a darker colour) After preserving the yellow areas, I submerged the egg in the red dye. With the increasing amount of lumps and bumps of beeswax building up, it might not look very elegant at this stage! Do not worry; it will all come good in the end. Promise.

9. Repeat the process for as many other dyes you have left in the design. After red, I had a green layer (for some tiny dots!) and then a final dunk in black. When the final colour is dry, you do not need to add any more beeswax on top.

Step 10: Time to wipe the beeswax off! To do this, I gently held the egg close to the candle flame, allowing the heat to soften the beeswax. Then, using a clean rag or piece of kitchen roll, I wiped the softened wax off the shell. It is very satisfying!
Note: Do not hold the egg near the flame for too long; just long enough to warm the wax so it can be wiped away.
Step 11: Admire your work! With all the beeswax removed, you can now see your finished design. Your first egg will always be special, regardless of any errors or imperfections. Now you have the idea, you can try out other designs. Perhaps you will sketch something out first, or perhaps you will just draw freely and see what emerges.

Mind the hole! With the design shown here, I found that even though I had sealed the egg hole with beeswax, I had not done so thoroughly enough and some dye crept in. This is why it is so important to dry the egg between dips and, ideally, to stand the egg upright with the hole at the bottom, so any dye that has seeped inside can drip out overnight. Just place some tissue underneath to catch the drips. If I had not drained the egg of dye before removing the beeswax, the black dye could have seeped out and stained the pale areas of the design. I was lucky. The egg dried out nicely and the finished design turned out very well.


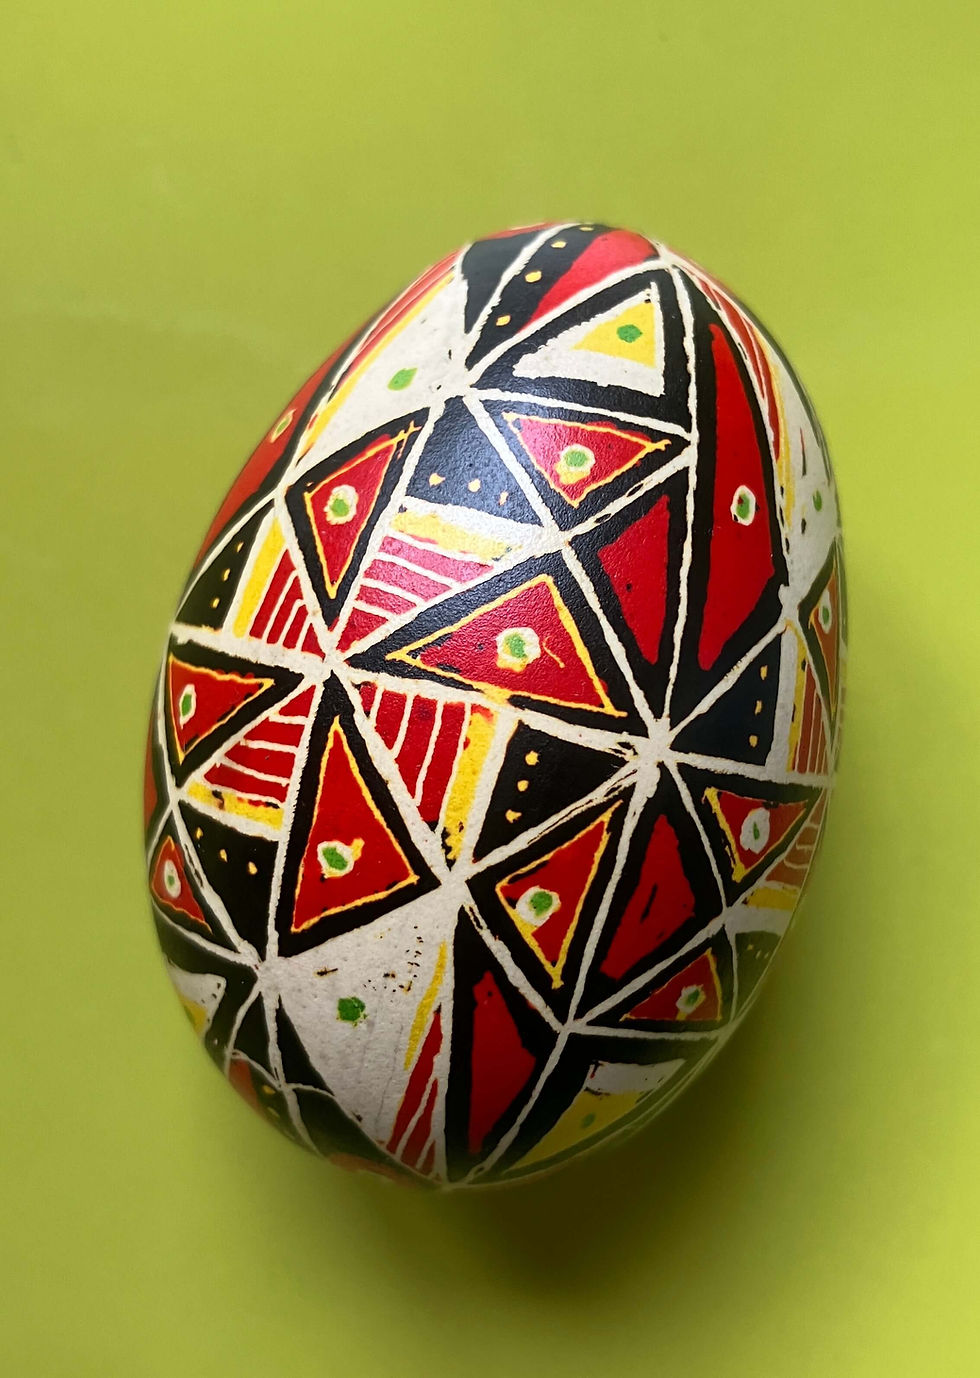
Caring for Your Pysanky: to lacquer spray or not?
There are various articles online about how to preserve your Pysanky. I have sprayed a few of mine, which has given them a slightly glossy sheen that I find very satisfying. I did have one occasion where the lacquer caused the design to bleed, though I think I held the spray can too close to the egg. It is the only time it has happened. Here are a few photos of some finished, lacquered eggs.


Final Thoughts
I really hope you give this craft a go; it is such a lovely thing to try! As mentioned above, beeswax bars are available in my shop, and if you do make some Pysanky eggs of your own, please send me a photo as I would love to see them! I will add it here so others can be inspired by your creations.


Comments